Grout is the material between tiles. Your floor type determines which cleaner and how much water are safe.
Why it matters: Grit scratches floors. Standing water and harsh chemicals can damage wood, laminate, stone, grout, or sealers.
Written guidance reviewed: September 17, 2026 · Sources and equipment assumptions are below.
Take this guide to another device
Steps, notes, supplies, setup choices, results and check dates save on this browser as you work. Plus can also keep an account copy. Account copies update only when you choose Save; loading one replaces the browser draft shown here.
Review all saved work. Saved account check dates appear in My Day. Clear the date and save again to finish a follow-up. Email settings stay separate; existing opted-in agenda or deadline emails can include these dated actions.
Understand the job before starting
Tile, grout and other flooring are different surfaces with their own care instructions.
A common mistake to avoid
More water or stronger cleaner is not an automatic fix for a stubborn mark.
Words used in this guide
Rent
The amount paid to use someone else’s property for an agreed time. Read the example
Use what you already have. Check each item when it is ready.
Before you begin
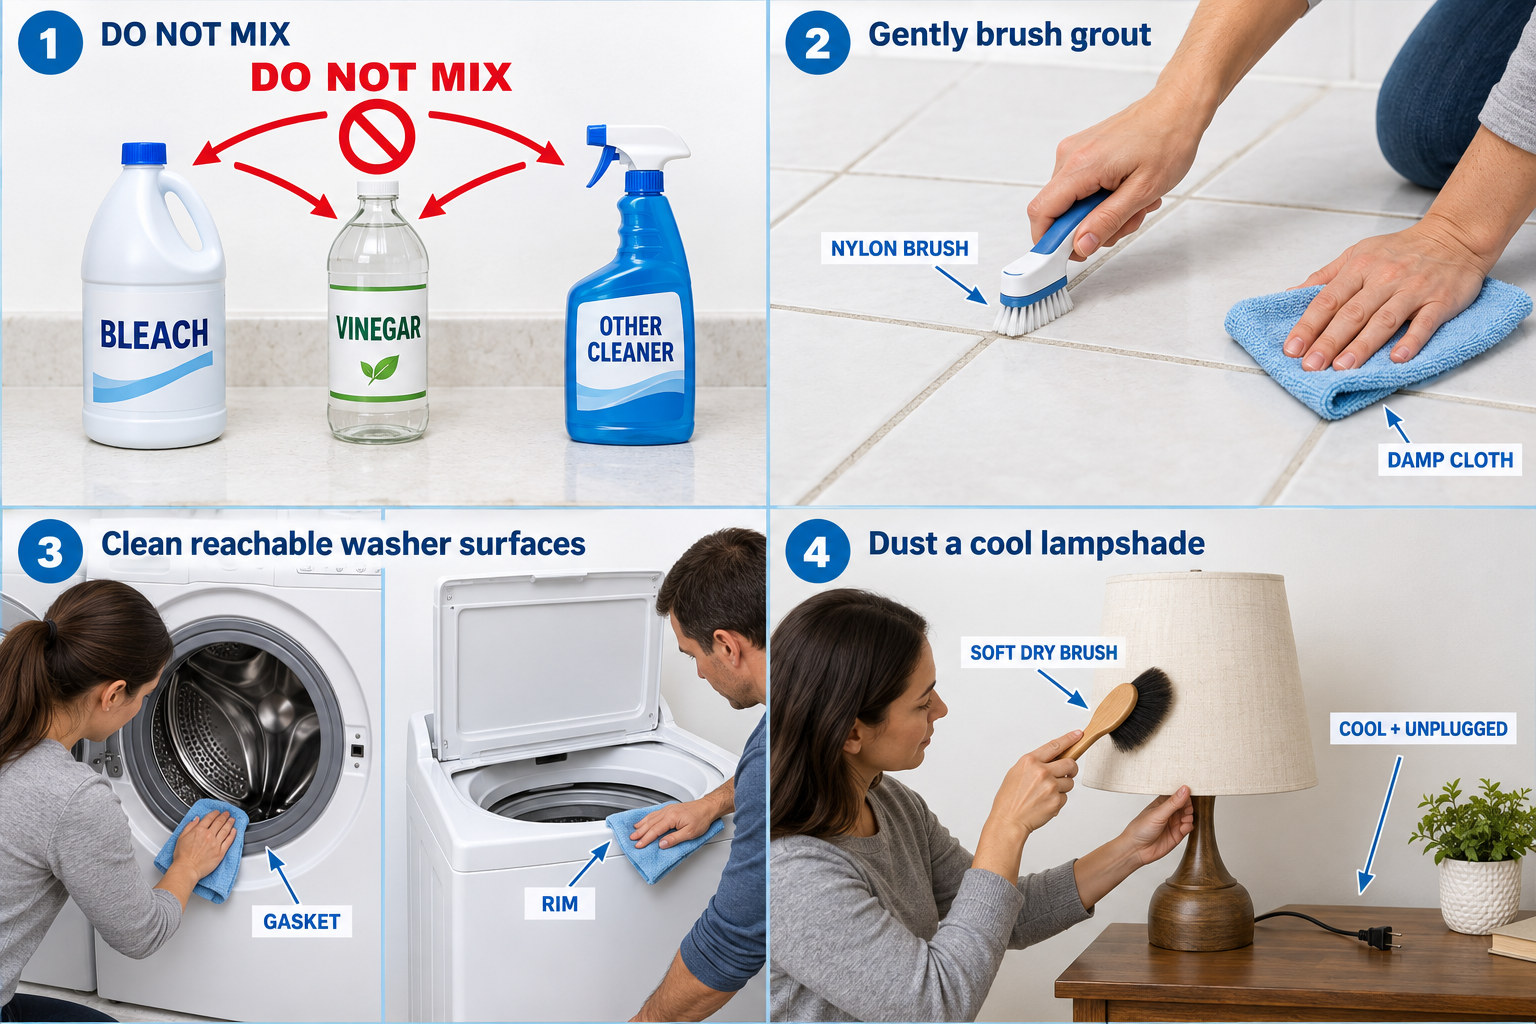
Do not use acidic vinegar on natural stone or assume bleach is safe for colored grout. Avoid steam unless the floor maker specifically permits it.
0 of 4 steps checked0%
Guide progress and notes save on this browser; choose Save account copy above to carry them to another device with Plus. Downloads contain the complete blank checklist; print to include your current checks and notes.
Do it with me
Your step position saves on this browser. Use the picture when available, then check the written result.
STEP 1 OF 4
Find out what the floor is
Start here: Identify the floor material.
Example: Identify the floor material. Follow the written step.
Read-aloud is available in supported browsers; the written steps always remain available.
Ask the landlord or check purchase records: tile, natural stone, vinyl, wood, and laminate need different care.
Choose a product approved for that surface.
If unsure, start with dry cleaning and ask before wet cleaning.
Before moving to the next step
Check this specific result: I identified the surface and compatible cleaner.
If that result is not true yet, leave the box unchecked. Write what is missing in your notes; use the official instructions below when the equipment or situation differs.
STEP 1 OF 4
Find out what the floor is
Start here: Identify the floor material.
Example: Identify the floor material. Follow the written step.
Ask the landlord or check purchase records: tile, natural stone, vinyl, wood, and laminate need different care.
Choose a product approved for that surface.
If unsure, start with dry cleaning and ask before wet cleaning.
Before moving to the next step
Check this specific result: I identified the surface and compatible cleaner.
If that result is not true yet, leave the box unchecked. Write what is missing in your notes; use the official instructions below when the equipment or situation differs.
STEP 2 OF 4
Remove dry dirt first
Start here: Collect dry dirt first.
Example: Collect dry dirt first. Follow the written step.
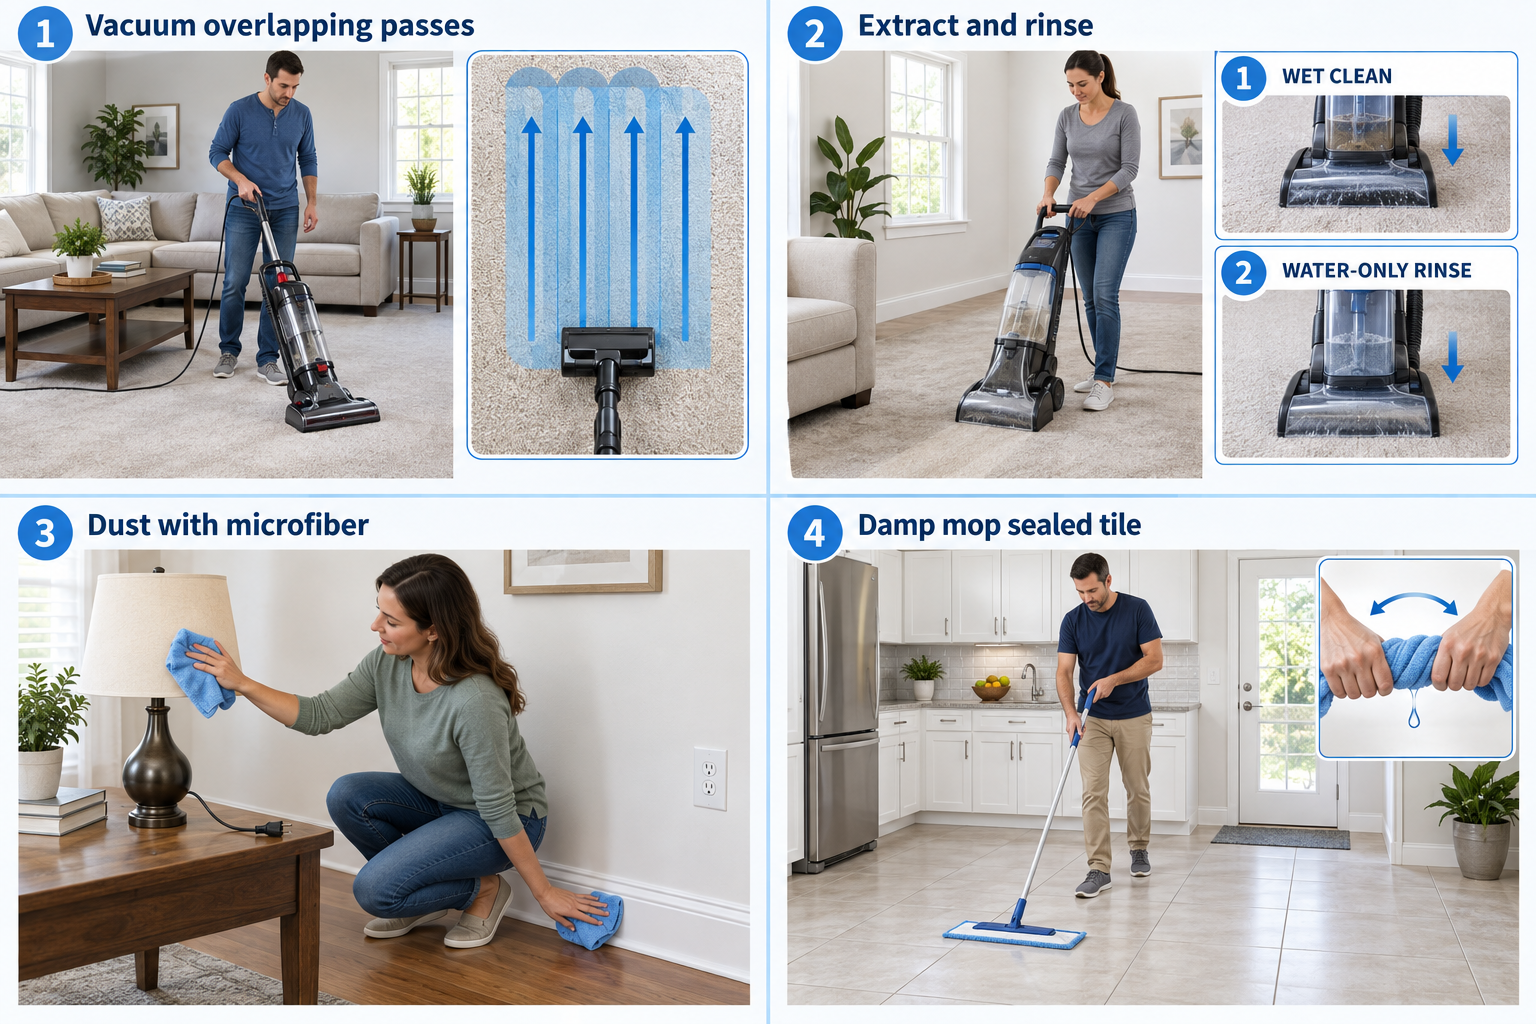
Vacuum or sweep, including under chairs.
Mix cleaner only at its label dose.
Too much can leave a sticky layer.
Never combine cleaners in the bucket.
Before moving to the next step
Check this specific result: Loose dirt is removed and the dilution is correct.
If that result is not true yet, leave the box unchecked. Write what is missing in your notes; use the official instructions below when the equipment or situation differs.
STEP 3 OF 4
Mop damp, not dripping
Start here: Mop damp, not dripping
Illustration: Damp mop sealed tile. Read the steps for your exact task.
Wring the mop well and clean a small area.
Change dirty water rather than spreading it around.
Follow the floor/cleaner directions for a plain-water rinse when needed.
Dry wet spots promptly and keep people off slippery areas.
Before moving to the next step
Check this specific result: There are no puddles or slippery residue.
If that result is not true yet, leave the box unchecked. Write what is missing in your notes; use the official instructions below when the equipment or situation differs.
STEP 4 OF 4
Brush grout gently
Start here: Brush grout gently
Illustration: Gently brush grout. Read the steps for your exact task.
Use a compatible grout cleaner and soft nylon brush.
Test first; let the label’s contact time pass without letting the product dry if prohibited.
Rinse as directed and dry.
Persistent staining, loose grout, or repeated mold may signal moisture damage that needs repair.
Before moving to the next step
Check this specific result: Grout is cleaned gently and any damage is reported.
If that result is not true yet, leave the box unchecked. Write what is missing in your notes; use the official instructions below when the equipment or situation differs.
Pictures for this guide
Picture 1 of 4 · Find out what the floor is
Find out what the floor is: Tile, stone, wood, or laminate?. Check the makers care method.
For: Find out what the floor is
Illustrations show examples of the actions above. Follow your equipment’s instructions.
Notes about these pictures
Ask the landlord or check purchase records: tile, natural stone, vinyl, wood, and laminate need different care. Choose a product approved for that surface. If unsure, start with dry cleaning and ask before wet cleaning.
Do not use acidic vinegar on natural stone or assume bleach is safe for colored grout. Avoid steam unless the floor maker specifically permits it.
Was this step clear?
Flag “Find out what the floor is” for review. We save the guide and step identifiers with your account to limit duplicates, not your private notes.
What to look for: This demonstrates the mopping portion. Floor finish, cleaner, water amount, and grout care still come from your surface instructions.
Link details checked 2026-10-03. Video availability and equipment menus can change.
These YouTube videos belong to their respective creators. Life’s Checklists does not own them and is not affiliated with the creators. Links open on YouTube, where the videos are available independently of our membership.
How to use the video with this guide
Read “Before you begin” first. Watch the relevant part, pause, then return to the written step and its completion check. Use captions and playback speed if they help. A demonstration may cover only part of the task or show different equipment.
Your model’s instructions and current official guidance take priority. For urgent problems, follow the stop instructions without waiting to watch a video.
For this guide, the final result is: Grout is cleaned gently and any damage is reported.
A concrete way to approach this task
List the floor material and the cleaner permitted for it. Keep tile, grout, wood, and other surfaces distinct.
What if I cannot complete a step?
If the surface looks damaged or remains unusually slippery, stop and check the cleaner and floor instructions before repeating the method.
Identify the exact step: “Find out what the floor is.” Record what you tried, what happened, and which item or model you used. Ask for help with that specific problem rather than repeating an unsafe or unsuccessful action.
Do not use acidic vinegar on natural stone or assume bleach is safe for colored grout. Avoid steam unless the floor maker specifically permits it.
Connect this skill to everyday life
Write down the total move-in cash and monthly costs before applying. Ask which charges are required and which are optional.
Advertised rent is not necessarily the whole monthly cost. A refundable deposit still needs cash now. An application does not mean you have a signed lease.