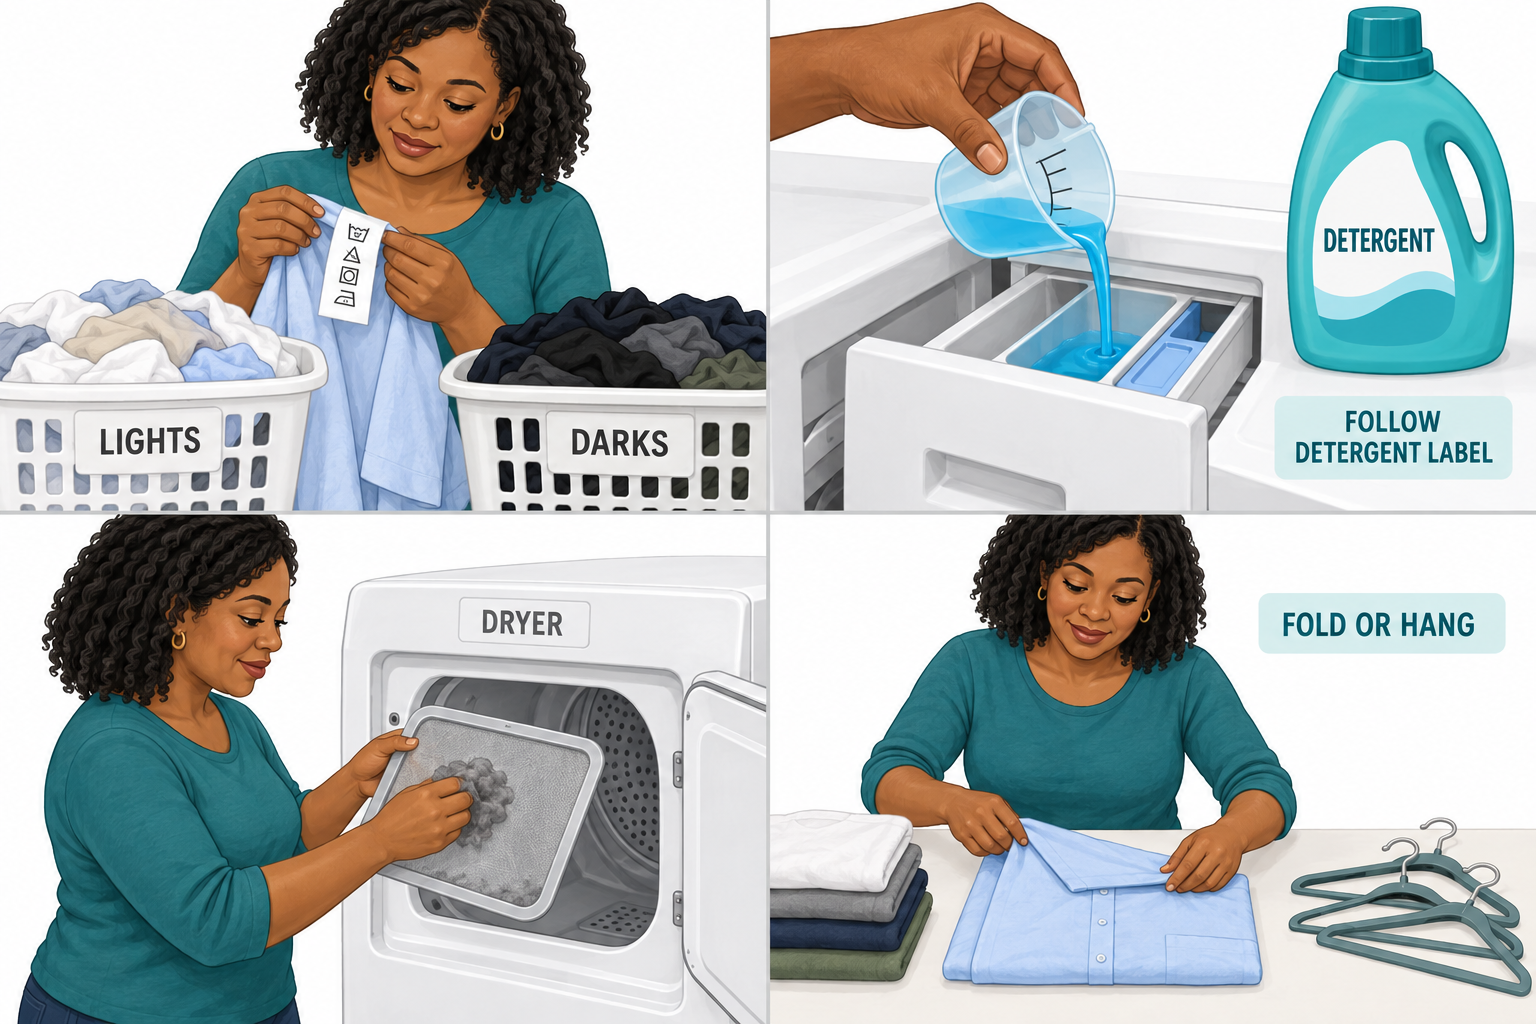
A washer removes dirt with water and detergent. A dryer removes moisture. The clothing label tells you what the fabric can handle.
Why it matters: Too much detergent, high heat, and overloaded machines can damage clothes or leave them dirty.
Written guidance reviewed: September 17, 2026 · Sources and equipment assumptions are below.
Take this guide to another device
Steps, notes, supplies, setup choices, results and check dates save on this browser as you work. Plus can also keep an account copy. Account copies update only when you choose Save; loading one replaces the browser draft shown here.
Review all saved work. Saved account check dates appear in My Day. Clear the date and save again to finish a follow-up. Email settings stay separate; existing opted-in agenda or deadline emails can include these dated actions.
Make this fit your setup
Choose what applies. These notes help you prepare; every original step and safety check stays in the guide.
Compare the label with the drying method
The example separates a garment that permits tumble drying from one that must dry flat. Your own care label decides.
Original Life’s Checklists diagram · example only
Understand the job before starting
Clothing labels decide grouping, wash method and drying. Decide all three before starting.
A common mistake to avoid
One washer setting is not suitable for every item that fits in the drum.
Words used in this guide
Rent
The amount paid to use someone else’s property for an agreed time. Read the example
The order of the job
Read labels and empty pockets
Make a load of similar clothes
Measure detergent and choose a cycle
Move clothes promptly and clean the dryer lint screen
Use what you already have. Check each item when it is ready.
Before you begin
Keep detergent away from children and pets. Never put fuel-, solvent-, or oil-soaked items into a dryer. Ask for help with dry-clean-only items.
0 of 6 steps checked0%
Guide progress and notes save on this browser; choose Save account copy above to carry them to another device with Plus. Downloads contain the complete blank checklist; print to include your current checks and notes.
Do it with me
Your step position saves on this browser. Use the picture when available, then check the written result.
STEP 1 OF 6
Read labels and empty pockets
Start here: Read labels and empty pockets
Illustration: Read tags and sort. Read the steps for your exact task.
Read-aloud is available in supported browsers; the written steps always remain available.
Check the label inside each garment.
It may say machine wash, hand wash, dry clean, or do not tumble dry.
Empty pockets, close zippers, and check stains.
Ask the laundry desk or search the garment maker’s care guide if a symbol is unfamiliar.
Before moving to the next step
Check this specific result: I checked labels, pockets, and stains.
If that result is not true yet, leave the box unchecked. Write what is missing in your notes; use the official instructions below when the equipment or situation differs.
STEP 1 OF 6
Read labels and empty pockets
Start here: Read labels and empty pockets
Illustration: Read tags and sort. Read the steps for your exact task.
Check the label inside each garment.
It may say machine wash, hand wash, dry clean, or do not tumble dry.
Empty pockets, close zippers, and check stains.
Ask the laundry desk or search the garment maker’s care guide if a symbol is unfamiliar.
Before moving to the next step
Check this specific result: I checked labels, pockets, and stains.
If that result is not true yet, leave the box unchecked. Write what is missing in your notes; use the official instructions below when the equipment or situation differs.
STEP 2 OF 6
Make a load of similar clothes
Start here: Build a small compatible load.
Example: Build a small compatible load. Follow the written step.
Separate items that can bleed color, very dirty work clothes, and delicate fabrics.
Wash new dark or bright clothes separately at first.
Put delicate washable items in a mesh bag if their label allows it.
Do not stuff the drum tightly.
Before moving to the next step
Check this specific result: This load has similar colors and care needs.
If that result is not true yet, leave the box unchecked. Write what is missing in your notes; use the official instructions below when the equipment or situation differs.
STEP 3 OF 6
Measure detergent and choose a cycle
Start here: Measure detergent and choose a cycle
Illustration: Measure detergent. Read the steps for your exact task.
Read the detergent cap lines for your load size and soil.
Use HE detergent where the machine requires it.
Put it in the manual’s dispenser; pods usually go in a specific place, not an arbitrary drawer.
Cold water and a normal cycle suit many everyday garments, but the care label decides.
Before moving to the next step
Check this specific result: I measured the right detergent and selected the label-compatible cycle.
If that result is not true yet, leave the box unchecked. Write what is missing in your notes; use the official instructions below when the equipment or situation differs.
STEP 4 OF 6
Move clothes promptly and clean the dryer lint screen
Start here: Move clothes promptly and clean the dryer lint screen
Illustration: Clean DRYER lint screen. Read the steps for your exact task.
Check stains before heat can set them.
Remove the dryer’s user-accessible lint screen, lift lint off by hand, and replace it securely before each load.
The dryer screen may be at the door or on top.
This is different from a washer’s pump filter.
Before moving to the next step
Check this specific result: I checked stains and emptied the dryer lint screen.
If that result is not true yet, leave the box unchecked. Write what is missing in your notes; use the official instructions below when the equipment or situation differs.
STEP 5 OF 6
Dry gently or air-dry
Start here: Choose the safe drying method.
Example: Choose the safe drying method. Follow the written step.
Follow the label for heat and tumble drying.
Use a drying rack for items that say lay flat or line dry.
Spread items out with airflow.
Do not put dripping clothes in the dryer or run it while asleep or away.
Stop if it overheats, smells burnt, or takes unusually long.
Before moving to the next step
Check this specific result: The clothes are dry using a permitted method.
If that result is not true yet, leave the box unchecked. Write what is missing in your notes; use the official instructions below when the equipment or situation differs.
STEP 6 OF 6
Fold or hang before putting away
Start here: Fold or hang before putting away
Illustration: Fold and hang. Read the steps for your exact task.
Shake out a shirt, place it face down, fold sleeves inward, fold sides, then fold the bottom up.
Fold pants lengthwise and then in halves.
Hang shirts on a suitable hanger with the shoulder seam supported.
Lay heavy knits flat so they do not stretch.
Put away only fully dry clothes.
Before moving to the next step
Check this specific result: I folded or hung the dry clothes and left the laundry area clean.
If that result is not true yet, leave the box unchecked. Write what is missing in your notes; use the official instructions below when the equipment or situation differs.
Pictures for this guide
Picture 1 of 6 · Read tags and sort
An adult examines a shirt care label beside separate baskets for light and dark clothing.
For: Read labels and empty pockets
Illustrations show examples of the actions above. Follow your equipment’s instructions.
Notes about these pictures
Check the label inside each garment. It may say machine wash, hand wash, dry clean, or do not tumble dry. Empty pockets, close zippers, and check stains. Ask the laundry desk or search the garment maker’s care guide if a symbol is unfamiliar.
Keep detergent away from children and pets. Never put fuel-, solvent-, or oil-soaked items into a dryer. Ask for help with dry-clean-only items.
Was this step clear?
Flag “Read labels and empty pockets” for review. We save the guide and step identifiers with your account to limit duplicates, not your private notes.
What to look for: Watch the overall washing and drying sequence. Garment care labels, detergent directions, and your washer’s instructions take priority.
Link details checked 2026-10-03. Video availability and equipment menus can change.
These YouTube videos belong to their respective creators. Life’s Checklists does not own them and is not affiliated with the creators. Links open on YouTube, where the videos are available independently of our membership.
How to use the video with this guide
Read “Before you begin” first. Watch the relevant part, pause, then return to the written step and its completion check. Use captions and playback speed if they help. A demonstration may cover only part of the task or show different equipment.
Your model’s instructions and current official guidance take priority. For urgent problems, follow the stop instructions without waiting to watch a video.
For this guide, the final result is: I folded or hung the dry clothes and left the laundry area clean.
A concrete way to approach this task
Practice with one small load of items whose care labels you understand. Decide on the drying method before starting the wash.
What if I cannot complete a step?
If labels conflict or an item needs special care, separate it from the practice load and follow its own label.
Identify the exact step: “Read labels and empty pockets.” Record what you tried, what happened, and which item or model you used. Ask for help with that specific problem rather than repeating an unsafe or unsuccessful action.
Keep detergent away from children and pets. Never put fuel-, solvent-, or oil-soaked items into a dryer. Ask for help with dry-clean-only items.
Connect this skill to everyday life
Write down the total move-in cash and monthly costs before applying. Ask which charges are required and which are optional.
Advertised rent is not necessarily the whole monthly cost. A refundable deposit still needs cash now. An application does not mean you have a signed lease.