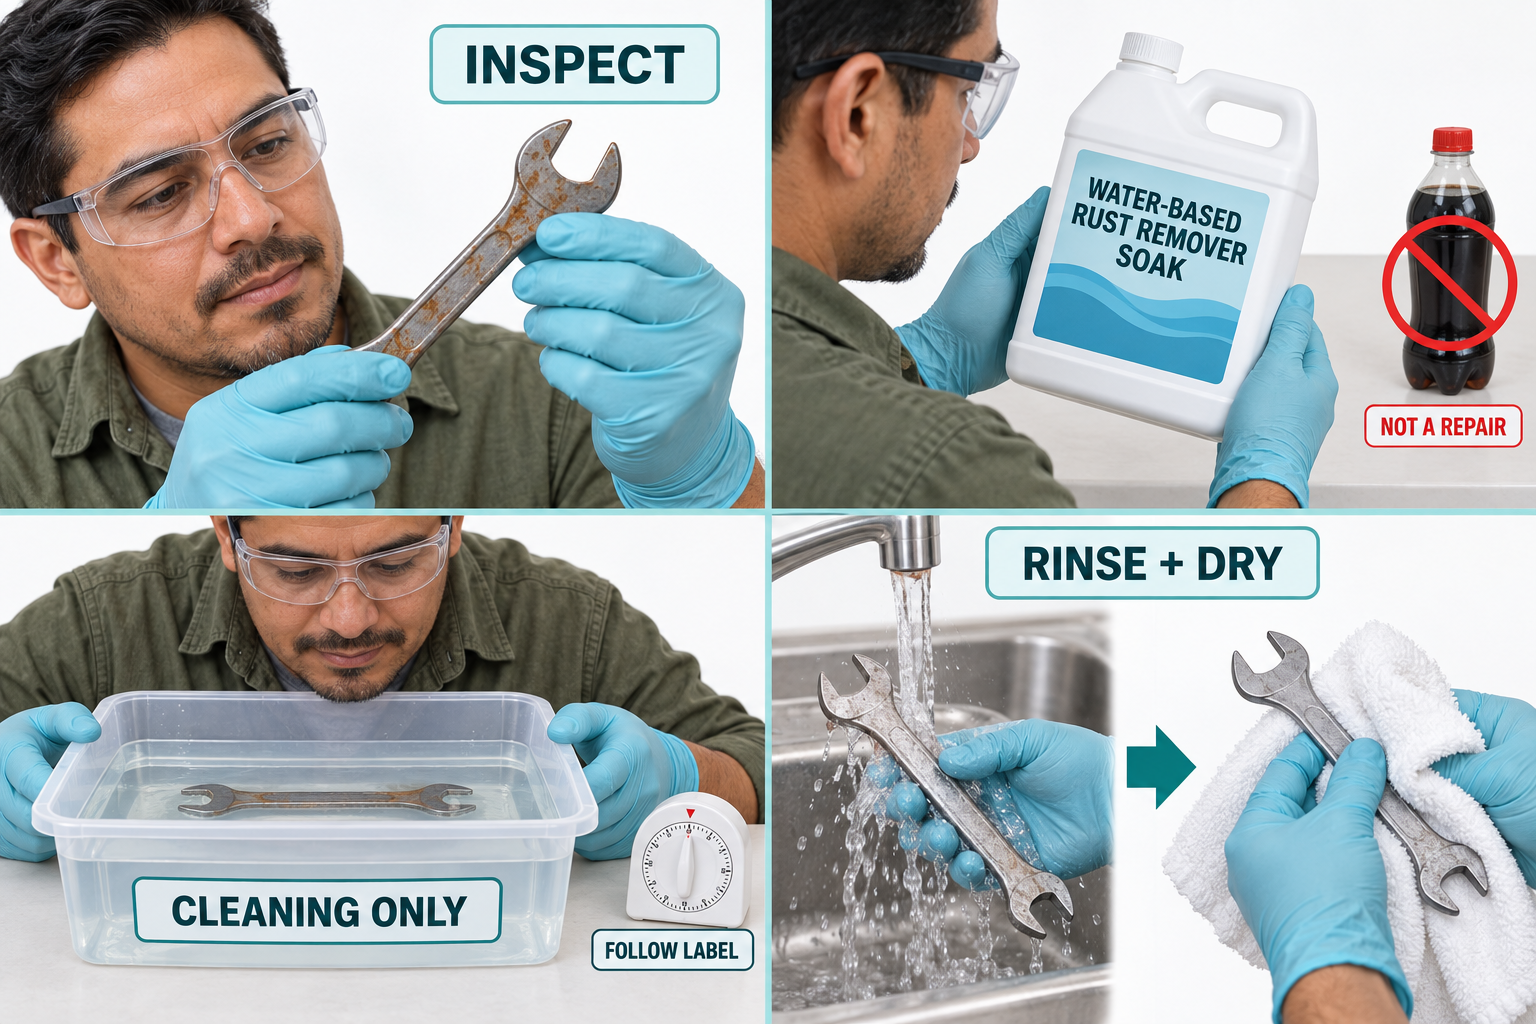
Rust is damage that forms on iron or steel. A light orange patch on a small hand tool may be cleanable. Cleaning cannot replace metal that has worn away.
Why it matters: Coke contains acid that can affect rust, but Coca-Cola’s own household-cleaning FAQ recommends regular cleaning products instead. Use a method made for the actual object.
Written guidance reviewed: September 18, 2026 · Sources and equipment assumptions are below.
Take this guide to another device
Steps, notes, supplies, setup choices, results and check dates save on this browser as you work. Plus can also keep an account copy. Account copies update only when you choose Save; loading one replaces the browser draft shown here.
Review all saved work. Saved account check dates appear in My Day. Clear the date and save again to finish a follow-up. Email settings stay separate; existing opted-in agenda or deadline emails can include these dated actions.
Understand the job before starting
Rust identification comes before choosing a removal method. The popular drink tip does not establish suitability.
A common mistake to avoid
Rust on a safety-critical component is not an ordinary cosmetic cleaning job.
Words used in this guide
Rent
The amount paid to use someone else’s property for an agreed time. Read the example
The order of the job
Inspect the object before buying anything
Separate the internet trick from a suitable cleaner
Use what you already have. Check each item when it is ready.
Before you begin
This guide is for a small hand tool such as a plain steel wrench. Do not apply it to batteries, powered tools, electronics, cookware, vehicle safety parts, or structural parts. Deep pits, cracks, flaking metal, or an unknown coating need the maker’s advice. No cleaning method proves a damaged tool is safe.
0 of 5 steps checked0%
Guide progress and notes save on this browser; choose Save account copy above to carry them to another device with Plus. Downloads contain the complete blank checklist; print to include your current checks and notes.
Do it with me
Your step position saves on this browser. Use the picture when available, then check the written result.
STEP 1 OF 5
Inspect the object before buying anything
Start here: Inspect the object before buying anything
Illustration: Inspect the tool. Read the steps for your exact task.
Read-aloud is available in supported browsers; the written steps always remain available.
Surface rust is rust sitting on the outside.
Pitting means little holes where metal has been lost.
Check in good light.
If you see cracks, deep holes, sharp flakes, or a loose handle, set the tool aside.
Photograph the mark and find the brand’s care page.
Ask, “Can this model be soaked, and does it have a coating that could be removed?” A replacement may cost less than supplies for a one-time repair.
Before moving to the next step
Check this specific result: The tool has only light rust and its care instructions allow cleaning.
If that result is not true yet, leave the box unchecked. Write what is missing in your notes; use the official instructions below when the equipment or situation differs.
STEP 1 OF 5
Inspect the object before buying anything
Start here: Inspect the object before buying anything
Illustration: Inspect the tool. Read the steps for your exact task.
Surface rust is rust sitting on the outside.
Pitting means little holes where metal has been lost.
Check in good light.
If you see cracks, deep holes, sharp flakes, or a loose handle, set the tool aside.
Photograph the mark and find the brand’s care page.
Ask, “Can this model be soaked, and does it have a coating that could be removed?” A replacement may cost less than supplies for a one-time repair.
Before moving to the next step
Check this specific result: The tool has only light rust and its care instructions allow cleaning.
If that result is not true yet, leave the box unchecked. Write what is missing in your notes; use the official instructions below when the equipment or situation differs.
STEP 2 OF 5
Separate the internet trick from a suitable cleaner
Start here: Separate the internet trick from a suitable cleaner
Illustration: Choose the exact labeled product. Read the steps for your exact task.
The acid in cola can react with rust; that does not make a drink the right cleaner for a tool.
Do not pour Coke on a car battery.
For the example here, use the original ready-to-use Evapo-Rust soak only where its label and the tool maker allow it.
Its gel and spray versions have different instructions.
It can remove some intentional oxide finishes, such as bluing, and is not for magnesium.
No brand sponsors this guide.
Before moving to the next step
Check this specific result: I chose the exact compatible product and read its label.
If that result is not true yet, leave the box unchecked. Write what is missing in your notes; use the official instructions below when the equipment or situation differs.
STEP 3 OF 5
Prepare a small, controlled cleaning area
Start here: Prepare a separate work area.
Example: Prepare a separate work area. Follow the written step.
Keep food, pets, and children away.
Use the protection and ventilation stated on the label.
Choose a suitable tray marked “cleaning only”; do not use a drinking glass.
Remove excess dirt and oil from the tool as its maker directs, then rinse away that cleaner.
Add enough of the ready-to-use soak to cover the tool.
Do not add Coke, vinegar, bleach, or other chemicals.
Before moving to the next step
Check this specific result: My tool and tray are ready, with no other cleaner mixed in.
If that result is not true yet, leave the box unchecked. Write what is missing in your notes; use the official instructions below when the equipment or situation differs.
STEP 4 OF 5
Soak for the stated time, then rinse
Start here: Soak for the stated time, then rinse
Illustration: Follow the soak label. Read the steps for your exact task.
Immerse means place the whole approved metal part under the liquid.
The linked original soak instructions give about 30 minutes for light rust; your bottle’s directions come first.
Set a timer and keep the tray out of reach.
Lift the tool as the label directs and rinse thoroughly with water.
If rust remains, follow the product’s repeat instructions rather than increasing strength or mixing products.
Before moving to the next step
Check this specific result: I followed the label time and rinsed the tool thoroughly.
If that result is not true yet, leave the box unchecked. Write what is missing in your notes; use the official instructions below when the equipment or situation differs.
STEP 5 OF 5
Dry, inspect again, and store properly
Start here: Dry, inspect again, and store properly
Illustration: Rinse and dry. Read the steps for your exact task.
Dry the tool thoroughly as its care instructions direct.
Inspect the clean metal: rust removal can reveal damage that was hidden.
Do not use a cracked or deeply pitted tool.
Follow the maker’s rust-prevention advice and store it somewhere dry.
Handle used solution under its label and your local waste rules; contamination from the item can affect disposal.
Do not automatically pour it down a drain or outside.
Before moving to the next step
Check this specific result: The tool is dry, checked, and safely stored or set aside for replacement.
If that result is not true yet, leave the box unchecked. Write what is missing in your notes; use the official instructions below when the equipment or situation differs.
Thing you might use
Where it fits
Why it is limited
Coke / cola
Explains why an acidic drink appears in rust-cleaning tricks.
The drink maker recommends normal cleaners; it does not repair metal.
A labeled rust-remover soak
A compatible small metal item that can be submerged.
Check the exact product, coating, metal, and disposal instructions.
Cooking oil
Some cookware care methods call for it.
Not a universal rust-remover or tool-protection instruction.
Professional help or replacement
Damaged, valuable, structural, or safety-critical objects.
A shiny surface does not prove strength or safety.
Pictures for this guide
Picture 1 of 5 · Inspect the tool
An adult wearing gloves and eye protection inspects light surface rust on a small steel wrench.
For: Inspect the object before buying anything
Illustrations show examples of the actions above. Follow your equipment’s instructions.
Notes about these pictures
Surface rust is rust sitting on the outside. Pitting means little holes where metal has been lost. Check in good light. If you see cracks, deep holes, sharp flakes, or a loose handle, set the tool aside. Photograph the mark and find the brand’s care page. Ask, “Can this model be soaked, and does it have a coating that could be removed?” A replacement may cost less than supplies for a one-time repair.
This guide is for a small hand tool such as a plain steel wrench. Do not apply it to batteries, powered tools, electronics, cookware, vehicle safety parts, or structural parts. Deep pits, cracks, flaking metal, or an unknown coating need the maker’s advice. No cleaning method proves a damaged tool is safe.
Was this step clear?
Flag “Inspect the object before buying anything” for review. We save the guide and step identifiers with your account to limit duplicates, not your private notes.
What to look for: This shows a purpose-made rust remover on workshop parts, not a Coke cleaning recipe. Follow your product label, material limits, and local disposal rules.
Link details checked 2026-10-03. Video availability and equipment menus can change.
These YouTube videos belong to their respective creators. Life’s Checklists does not own them and is not affiliated with the creators. Links open on YouTube, where the videos are available independently of our membership.
How to use the video with this guide
Read “Before you begin” first. Watch the relevant part, pause, then return to the written step and its completion check. Use captions and playback speed if they help. A demonstration may cover only part of the task or show different equipment.
Your model’s instructions and current official guidance take priority. For urgent problems, follow the stop instructions without waiting to watch a video.
For this guide, the final result is: The tool is dry, checked, and safely stored or set aside for replacement.
A concrete way to approach this task
Write down the object, material, and location of the rust. That gives you a specific question to ask before choosing a treatment.
What if I cannot complete a step?
If rust affects a safety-critical part or you cannot identify the surface, follow the stop guidance and get appropriate help instead of experimenting.
Identify the exact step: “Inspect the object before buying anything.” Record what you tried, what happened, and which item or model you used. Ask for help with that specific problem rather than repeating an unsafe or unsuccessful action.
This guide is for a small hand tool such as a plain steel wrench. Do not apply it to batteries, powered tools, electronics, cookware, vehicle safety parts, or structural parts. Deep pits, cracks, flaking metal, or an unknown coating need the maker’s advice. No cleaning method proves a damaged tool is safe.
Connect this skill to everyday life
Write down the total move-in cash and monthly costs before applying. Ask which charges are required and which are optional.
Advertised rent is not necessarily the whole monthly cost. A refundable deposit still needs cash now. An application does not mean you have a signed lease.