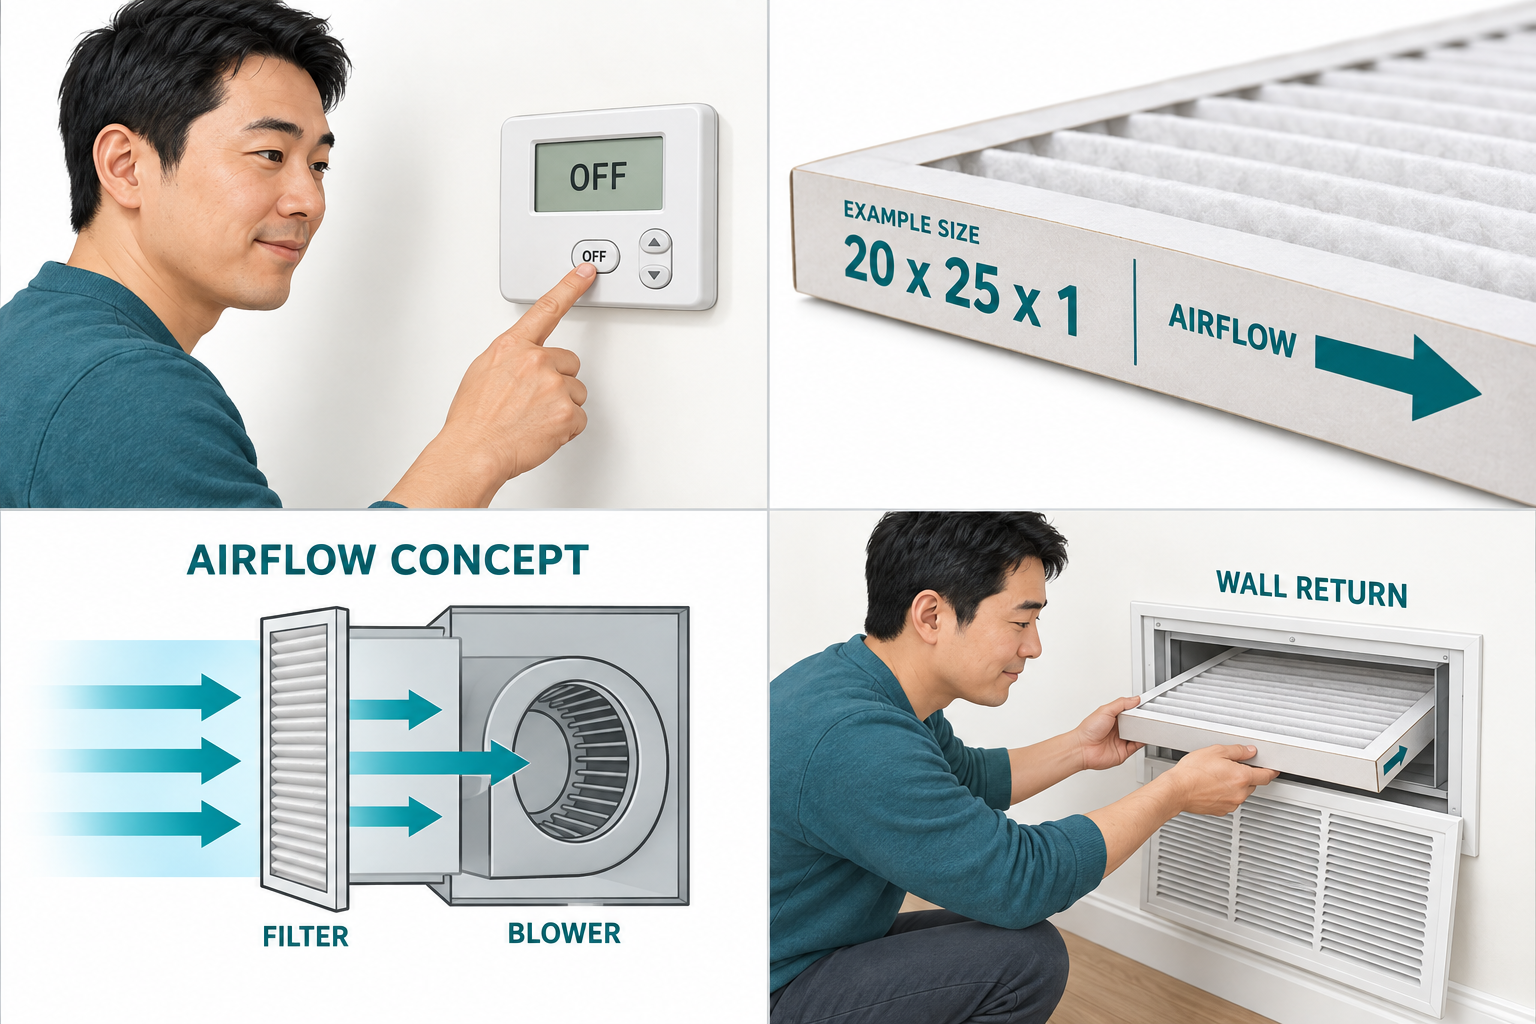
A filter catches particles before air moves through your heating and cooling system.
Why it matters: A blocked or unsuitable filter can restrict air and strain equipment. A higher rating is useful only when your system can handle it.
Written guidance reviewed: September 17, 2026 · Sources and equipment assumptions are below.
Take this guide to another device
Steps, notes, supplies, setup choices, results and check dates save on this browser as you work. Plus can also keep an account copy. Account copies update only when you choose Save; loading one replaces the browser draft shown here.
Review all saved work. Saved account check dates appear in My Day. Clear the date and save again to finish a follow-up. Email settings stay separate; existing opted-in agenda or deadline emails can include these dated actions.
Make this fit your setup
Choose what applies. These notes help you prepare; every original step and safety check stays in the guide.
Match the filter to the system
Identify: Model and manual: Approved access only · Compare: Specified size and type: Follow airflow direction · Check: Secure the normal cover: Record the next check. Stop for unfamiliar equipment or unsafe access. Ask maintenance.
Original Life’s Checklists diagram · example only
Understand the job before starting
Size, type, placement and orientation belong to the exact system instructions.
A common mistake to avoid
A nearly matching filter is not proof of a correct fit.
Words used in this guide
Rent
The amount paid to use someone else’s property for an agreed time. Read the example
HVAC
Short for heating, ventilation, and air conditioning: systems that heat, move, and cool air. Read the example
Blower
The fan that pushes air through parts of a heating or cooling system. Read the example
Use what you already have. Check each item when it is ready.
Before you begin
Ask your landlord who changes it. Stop if access needs a ladder, tools inside equipment, or removal of an electrical panel. A washable filter needs its own cleaning instructions.
0 of 5 steps checked0%
Guide progress and notes save on this browser; choose Save account copy above to carry them to another device with Plus. Downloads contain the complete blank checklist; print to include your current checks and notes.
Do it with me
Your step position saves on this browser. Use the picture when available, then check the written result.
STEP 1 OF 5
Find the user-accessible filter
Start here: Find the user-accessible filter
Illustration: Thermostat OFF. Read the steps for your exact task.
Read-aloud is available in supported browsers; the written steps always remain available.
Turn heating and cooling OFF at the thermostat and wait for the blower fan to stop.
A blower is the fan that moves air.
Look for a labeled filter slot beside the furnace/air handler or a return-air grille.
Use the manual to confirm the location; not every vent holds a filter.
Before moving to the next step
Check this specific result: I found the correct filter access and the fan is off.
If that result is not true yet, leave the box unchecked. Write what is missing in your notes; use the official instructions below when the equipment or situation differs.
STEP 1 OF 5
Find the user-accessible filter
Start here: Find the user-accessible filter
Illustration: Thermostat OFF. Read the steps for your exact task.
Turn heating and cooling OFF at the thermostat and wait for the blower fan to stop.
A blower is the fan that moves air.
Look for a labeled filter slot beside the furnace/air handler or a return-air grille.
Use the manual to confirm the location; not every vent holds a filter.
Before moving to the next step
Check this specific result: I found the correct filter access and the fan is off.
If that result is not true yet, leave the box unchecked. Write what is missing in your notes; use the official instructions below when the equipment or situation differs.
STEP 2 OF 5
Read all three size numbers
Start here: Read all three size numbers
Illustration: Read the size. Read the steps for your exact task.
Photograph the old filter edge before moving it.
A label such as 20 × 25 × 1 means width × length × thickness in inches.
This is often a rounded, nominal size; the actual size may be smaller.
Match the specified size and actual dimensions.
Do not force a different thickness into the slot.
Before moving to the next step
Check this specific result: I recorded the specified size and approved type.
If that result is not true yet, leave the box unchecked. Write what is missing in your notes; use the official instructions below when the equipment or situation differs.
STEP 3 OF 5
Choose a rating the system supports
Start here: Check the supported filter rating.
Example: Check the supported filter rating. Follow the written step.
MERV rates particle capture, not physical thickness.
Higher MERV generally captures smaller particles.
Ask the manual or an HVAC technician for the highest suitable rating.
EPA suggests MERV 13, or as high as the system can accommodate.
Do not add a second filter or buy the densest one just because it costs more.
Before moving to the next step
Check this specific result: My replacement size and MERV match the system requirements.
If that result is not true yet, leave the box unchecked. Write what is missing in your notes; use the official instructions below when the equipment or situation differs.
STEP 4 OF 5
Put the airflow arrow toward the blower
Start here: Put the airflow arrow toward the blower
Illustration: Air flows toward blower. Read the steps for your exact task.
Remove the old filter gently and bag it.
Find the printed AIR FLOW arrow on the new frame.
It points in the direction air travels toward the blower, away from the room at a return grille.
Match the equipment’s airflow marking.
If you cannot identify the blower direction, ask before installing.
Before moving to the next step
Check this specific result: The printed arrow points toward the blower.
If that result is not true yet, leave the box unchecked. Write what is missing in your notes; use the official instructions below when the equipment or situation differs.
STEP 5 OF 5
Close it and make a reminder
Start here: Close it and make a reminder
Illustration: Replace in return slot. Read the steps for your exact task.
Slide the filter fully into its holder without bending it.
Close the normal access cover.
Restore the thermostat setting.
Note the date and check interval from the manual; dust, pets, smoke, and use change how quickly it gets dirty.
Check sooner if airflow drops.
Before moving to the next step
Check this specific result: The cover is closed and my next check is scheduled.
If that result is not true yet, leave the box unchecked. Write what is missing in your notes; use the official instructions below when the equipment or situation differs.
Filter feature
What it means
Your choice
Size
Width, height, and depth; nominal and actual sizes may differ.
Match the equipment specification.
MERV 1–4 / 5–8
Lower ranges mainly catch larger particles; capture improves across ratings.
Do not downgrade below the equipment or health needs without advice.
MERV 9–12 / 13–16
Higher ranges capture more small particles. Pressure drop depends on the filter design.
Ask whether the blower and filter rack support it.
Thicker media
A deeper filter is not automatically a higher MERV.
Use only the depth designed for the rack.
Pictures for this guide
Picture 1 of 5 · Thermostat OFF
An adult selects OFF on a wall thermostat.
For: Find the user-accessible filter
Illustrations show examples of the actions above. Follow your equipment’s instructions.
Notes about these pictures
Turn heating and cooling OFF at the thermostat and wait for the blower fan to stop. A blower is the fan that moves air. Look for a labeled filter slot beside the furnace/air handler or a return-air grille. Use the manual to confirm the location; not every vent holds a filter.
Ask your landlord who changes it. Stop if access needs a ladder, tools inside equipment, or removal of an electrical panel. A washable filter needs its own cleaning instructions.
Was this step clear?
Flag “Find the user-accessible filter” for review. We save the guide and step identifiers with your account to limit duplicates, not your private notes.
Link details checked 2026-10-03. Video availability and equipment menus can change.
These YouTube videos belong to their respective creators. Life’s Checklists does not own them and is not affiliated with the creators. Links open on YouTube, where the videos are available independently of our membership.
How to use the video with this guide
Read “Before you begin” first. Watch the relevant part, pause, then return to the written step and its completion check. Use captions and playback speed if they help. A demonstration may cover only part of the task or show different equipment.
Your model’s instructions and current official guidance take priority. For urgent problems, follow the stop instructions without waiting to watch a video.
For this guide, the final result is: The cover is closed and my next check is scheduled.
A concrete way to approach this task
Write down the exact filter size, location, and direction specified for your system. Keep the old label or a photo as a reference.
What if I cannot complete a step?
If the replacement does not fit or you cannot identify the correct orientation, check the system instructions before forcing it into place.
Identify the exact step: “Find the user-accessible filter.” Record what you tried, what happened, and which item or model you used. Ask for help with that specific problem rather than repeating an unsafe or unsuccessful action.
Ask your landlord who changes it. Stop if access needs a ladder, tools inside equipment, or removal of an electrical panel. A washable filter needs its own cleaning instructions.
Connect this skill to everyday life
Write down the total move-in cash and monthly costs before applying. Ask which charges are required and which are optional.
Advertised rent is not necessarily the whole monthly cost. A refundable deposit still needs cash now. An application does not mean you have a signed lease.